How to Clone Raspberry Pi SD Card on Windows
nguyennamdsn | Aug. 29, 2023, 3:59 p.m.
The Raspberry Pi is the ultimate tinkerer’s toy. Most of its users love to experiment and break working installations in the process. However, despite how much fun it is, everyone loves to have a working baseline configuration that that they can return to after the experiment is over.
Another common scenario is let’s say, you just got to know about a cool new Raspberry Pi-based project or Linux distro, and you are dying to try it out. Problem is, you only have one micro SD card, and already have a working installation on it that you do not want to lose.
In both the above scenarios, it is helpful to have an exact, bit-by-bit identical backup of your working Raspberry Pi installation. So today, we will learn how to clone or backup the Raspberry Pi micro SD card to an image file, and restore the image after we are done experimenting. We will explain how to do it on Windows, Linux, and finally macOS.
Note: This method will create an image file exactly the size of the SD card’s total capacity. For example, if you have a 16 GB SD card, the resulting image file will also be 16 GB, no matter how much space your installation is actually using. There is a method to shrink the image size, but it works only on Linux, and we will be explaining it later in the tutorial.
Windows Instructions
Backup Raspberry Pi SD Card
1. Insert the micro SD card that you want to clone in your PC using a USB or built-in card reader.
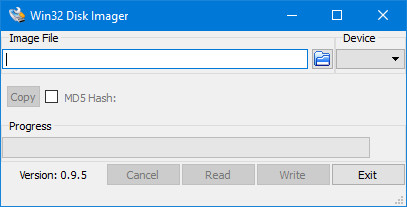
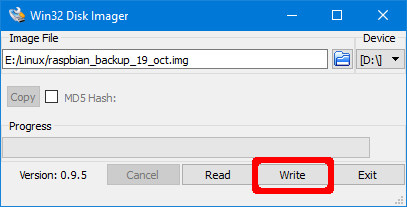
2. Download and install Win32DiskImager, and run it. You will see a screen like this:
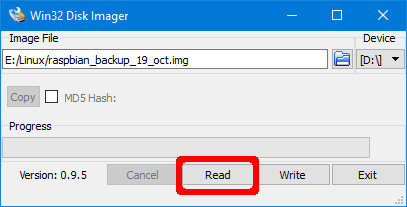
3. Under the Device section in the top right corner, select the drive of your SD card. It is D: in my case. Now click on the folder icon to its left, and choose a location and filename where the image file will be saved. I chose the file name raspbian_backup_19_oct.img. You can choose whichever filename you like, but it is preferable to have an .img extension. Once done, click on the Read button.
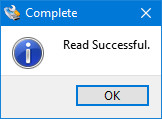
4. This will make a clone of the SD card in the location you specified. The copying will take a while to complete, so do not turn off or put your PC to sleep during this period. Once it is done, you will get a “Read Successful” message.
You are now free to insert the card back in your Raspberry Pi and break things or install a new distro. Once you are done playing and want to restore the backed up image, follow the steps in the next section.
Restore Raspberry Pi SD Card
Insert the micro SD card in your PC, and open Win32DiskImager. Select the image file you created previously, and the appropriate drive in the Device section. Now, click on the Write button. The image will be saved to the SD card, exactly how it was, at the time you copied it.
Again, this process will take a while depending on the size of the SD card. Once the restore is complete, you can remove the card from your PC, and insert it back in the Raspberry Pi.
Linux Instructions
Backup Raspberry Pi SD Card
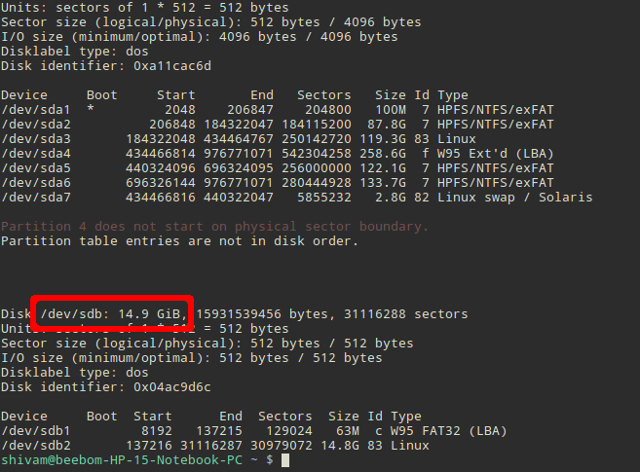
1. Insert the SD card in your PC using a USB or built-in card reader. Now open a Terminal window, and enter the command sudo fdisk -l. This will list all the filesystems present on your system.
2. Try to find out the device name of your SD card. I have a 16GB SD card, so it is easily identified as the device /dev/sdb which has a size of 14.9GB. This is because the actual storage on a device is always slightly lower than advertised. Note down this device name.
3. Use the dd command to write the image to your hard disk. For example:
sudo dd if=/dev/sdb of=~/raspbian_backup.img
Here, the if parameter (input file) specifies the file to clone. In my case, it is /dev/sdb, which is my SD card’s device name. Replace it with the device name of yours. The of parameter (output file) specifies the file name to write to. I chose raspbian_backup.img in my home directory.
Note: Be careful, and double check the parameters before executing the dd command, as entering the wrong parameters here can potentially destroy the data on your drives.
You will not see any output from the command until after the cloning is complete, and that might take a while, depending on the size of your SD card. Once it is complete, you will see an output like the following.

You can now remove the SD card and use it in your Pi. Once you are ready to restore the backed up image, follow the instructions below:
Restore Raspberry Pi SD Card
1. Insert the SD card in your PC. Before we restore the image, it is important to make sure that the SD card’s partitions are unmounted. To verify this, open the Terminal, and execute the command sudo mount | grep sdb. Here, replace sdb with your SD card’s device name.
If you see a blank output, you do not need to do anything. If you do see some mounted partitions, unmount the listed ones. For example:
sudo umount /dev/sdb1 /dev/sdb2 /dev/sdb3 /dev/sdb4
2. Use the dd command to write the image file to the SD card:
sudo dd if=~/raspbian_backup.img of=/dev/sdb
This is like the command we used to make a clone, but reversed. This time, the input file if is the backup image, while the output file of is the SD card device.
Again, verify, and double-verify the parameters here, as entering the wrong command here will cause permanent data loss.
Once the write is complete, you will see a confirmation from dd. You can then remove the card from your PC, and insert it back in the Raspberry Pi.
https://beebom.com/how-clone-raspberry-pi-sd-card-windows-linux-macos/